You've decided to go big. Giant inflatable balls are the move — whether it's a rooftop brand activation, a hotel atrium display, or a backyard celebration that people will talk about for years. But before you inflate the first ball, there's a fundamental question to answer: Is this setup going indoors or outdoors?
The answer changes almost everything — from the products you choose to how you anchor them, the surface prep you'll need, lighting decisions, logistics, and contingency planning. This guide breaks it all down so you can plan with confidence and execute without surprises.
Why the Indoor vs. Outdoor Decision Matters So Much
Inflatable balls respond to their environment, even when fully inflated and anchored — air currents, temperature changes, surface friction, humidity. Outdoors, those forces are amplified significantly. Indoors, you trade weather variables for spatial constraints and surface sensitivity.
Getting the setup environment right isn't just about aesthetics. It affects:
- Safety — proper anchoring prevents unexpected movement in wind or crowd situations
- Visual impact — the same ball looks dramatically different in sunlight vs. artificial light
- Logistics — access points, inflation equipment, and transport routes differ entirely
- Product selection — some finishes and sizes perform better in specific environments
Let's go environment by environment.
Outdoor Inflatable Ball Setups
The Big Variable: Wind
Wind is the #1 factor in any outdoor inflatable installation. A light breeze that feels pleasant to guests can create significant lateral force on a large ball. The larger the surface area, the more force wind exerts.

General wind guidelines:
- Under 10 mph: Most setups are stable with standard anchoring
- 10–20 mph: Requires robust anchoring; reduce ball count or cluster low
- Over 20 mph: Deflate large pieces; use smaller balls only in sheltered positions
Always check the forecast for the full event window — including setup and breakdown — not just the peak event hours. Early morning setup often has calmer conditions that shift by afternoon.
Anchoring Methods for Outdoor Use
There's no single "right" method. The best anchoring depends on your surface, the ball size, and the wind conditions expected.
Ground stakes + tie-down straps — The go-to for grass, dirt, and soft surfaces. Drive stakes at 45° angles away from the ball, attach straps to the ball's anchor points, and tension evenly from all sides. For larger balls (6 ft and up), use a minimum of 4 stake points.
Sandbags or weighted bases — Ideal for pavement, concrete, decks, and any surface where you can't drive stakes. Place weight in a circular pattern around the base of the ball, and add more in windier conditions.
Water weights — Freestanding water-fillable anchor bags suit urban outdoor events. They're portable, easy to deploy, leave no surface damage, and can be emptied for transport. Pair with a short tie-down tether to the ball.
Netting — A lightweight netting system tethered to multiple fixed points (fence posts, tent poles, structures) can help keep a group of balls in place.
Explore our Big Shiny Balls, which have metal D-rings built in for anchoring.

Surfaces & Placement
Where the ball actually sits matters for stability and aesthetics. Outdoor surfaces introduce challenges that indoor floors don't:
- Grass/turf: Soft and forgiving for the ball itself, but can cause rolling if not anchored. Uneven terrain can affect how a display reads visually — scout the site and pick the flattest patch.
- Asphalt/pavement: Provides grip on hot days but can soften in extreme heat; avoid leaving balls in contact with very hot asphalt for extended periods.
- Gravel: Avoid direct contact — small rocks can abrade the surface over time. Place a tarp or foam pad underneath.
- Sand/beach: Stakes work well here; use extra-long stakes (18"+ recommended). Sand shifts, so re-check tension every few hours.
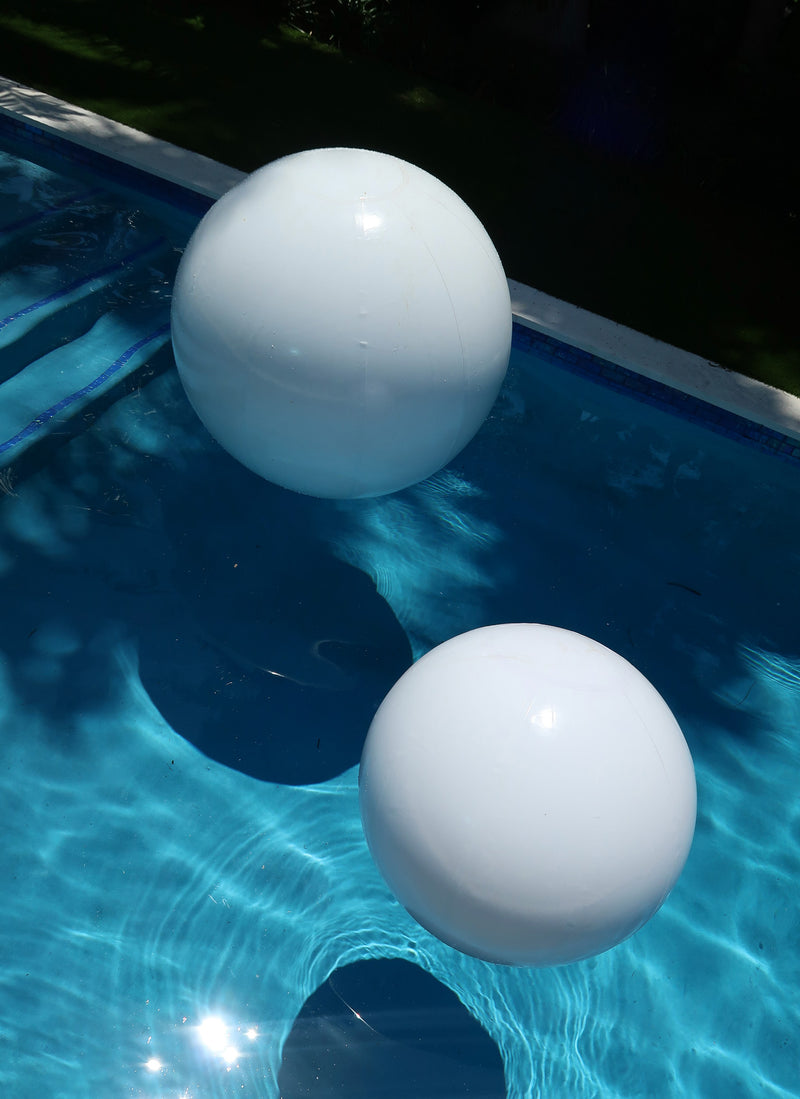
- Water: Yes — balls float beautifully in pools, ponds, and calm water features. See our pool party guide. Avoid cords and lines in the water while people are swimming.
Sun, Heat & Chrome Finishes Outdoors
This is where outdoor setups get gorgeous. Chrome and metallic inflatable balls in direct sunlight are pure theater — they mirror the sky, clouds, and landscape in ways that are genuinely stunning, especially at golden hour.

However, note:
- Direct sunlight increases internal air pressure as the air inside heats up. Release a small amount of air through the valve if the ball feels drum-tight in full sun.
- Matte finishes hold up beautifully outdoors and provide a more dramatic contrast against bright skies than indoors.
- White and light-colored balls in full sun read as near-glowing — great for daytime events, but check how they photograph in overexposed conditions.
Weather Contingency Planning
Always have a deflation plan. The best outdoor setups have a designated person who knows how to deflate and secure balls quickly if weather turns. Practice the deflate sequence before the event, not during it.
For multi-day outdoor setups, nightly deflation is worth considering for large pieces — it protects against overnight wind and dew.
Indoor Inflatable Ball Setups
The Advantage: Total Control
Indoor environments eliminate weather as a variable entirely. No wind, no sun damage, no rain contingencies. This lets you focus entirely on the visual composition, audience flow, and lighting design — which is where indoor setups can truly shine.
Ceiling Height Is Everything
The first site assessment for any indoor setup is ceiling height. A simple rule: your tallest ball should be no more than 60–70% of the ceiling height for a comfortable, proportionate look. Too close to the ceiling and the installation feels cramped; the balls look like they're pushing against the space rather than filling it elegantly.

Approximate minimums:
- 2–3 ft balls: Work in virtually any room
- 4 ft balls: 8 ft ceiling
- 6 ft balls: 10 ft ceiling
- 8 ft balls: 12 ft ceiling
- 10 ft balls: 15 ft ceiling
Check out our size guide for more detail on each size. Measure your doors too, because large balls may need to be inflated on site.
Indoor Anchoring: Less Force, More Finesse
Without wind to contend with, indoor anchoring is primarily about preventing rolling (on smooth floors) and keeping the display in position for the duration of the event.
Non-slip mats or rubber pads: The simplest solution for ground-level balls on smooth concrete, marble, or hardwood. Place a rubber mat under each ball — the ball's weight does the rest.
Ceiling rigging: Floating or elevated displays should be planned and installed by a qualified rigging professional, using rated hardware and ceiling points that can handle the load.
Display stands or ring bases: A clean solution for single-ball hero displays — a low-profile ring keeps the ball centered and prevents rolling.
Tape or floor markers: For balls that don't need restraint but need consistent repositioning (for example, if guests interact with them), floor tape markers help staff reset the arrangement quickly throughout an event.
Lighting: Where Indoor Setups Unlock Magic
This is the biggest advantage indoor has over outdoor: total lighting control. Chrome and mirror-finish balls indoors, lit with precision spotlights, create reflections that can turn an entire room into an immersive environment.

Lighting approaches that work exceptionally well:
- Pin spots from above: A tight beam on a chrome ball throws points of light across the ceiling and walls. Stunning in dark event spaces.
- Colored gels: Wash chrome balls in colored light to match brand colors or event themes. The reflection picks up and distributes the color throughout the space.
- Backlight on matte finishes: Matte balls backlit against a dark background read as bold silhouettes — powerful for stage installations and dark lounges.
- Mixed finish clusters: Combine chrome and matte balls in a grouping — the chrome pieces act as light multipliers while the matte balls provide visual weight.
HVAC and Air Pressure
Indoor venues have HVAC systems that create consistent air movement — often more than guests notice. Check that vents won't push balls into walkways or lighting rigs.
Temperature-controlled spaces also keep the pressure inside your balls more consistent, so properly inflated balls should hold their shape well for multi-day installations.
Side-by-Side Setup Checklist
Outdoor Must-Haves:
- ✅ Wind forecast for full event window
- ✅ Anchoring system matched to surface type
- ✅ Surface protection (pads for rough/hot surfaces)
- ✅ Contingency deflation plan
- ✅ Pressure check mid-event if hot/sunny
- ✅ Permission from venue for stakes/weights if applicable
Indoor Must-Haves:
- ✅ Ceiling height measured and confirmed
- ✅ Floor protection (non-slip pads on smooth surfaces)
- ✅ Rigging professional booked if anything hangs overhead
- ✅ Lighting plan — spotlights, colored gels, pin spots
- ✅ HVAC direction mapped to avoid unexpected drift
- ✅ Access route confirmed (door widths for large balls)
Which Setup Is Right for Your Event?
Here's the honest answer: both environments work beautifully for inflatable ball installations — they just deliver different experiences. Outdoor setups are awe-inspiring at scale, especially with chrome finishes reflecting landscape and sky. Indoor setups offer precision, drama, and photography conditions that are harder to achieve outside.
You can also do both: an outdoor display to stop traffic and create first impressions at the entrance, and a curated indoor installation that creates the immersive atmosphere guests experience throughout the event.
Browse our Big Shiny Balls collection to find the right sizes and finishes for your vision, see our installation guide for step-by-step help, or reach out to our team for personalized setup recommendations based on your venue and event type.
The balls are ready. The only question left is where you're putting them.